Krok po kroku z Weroniką - Step by stem with Weronika
Cześć!
Hi!
Hi!
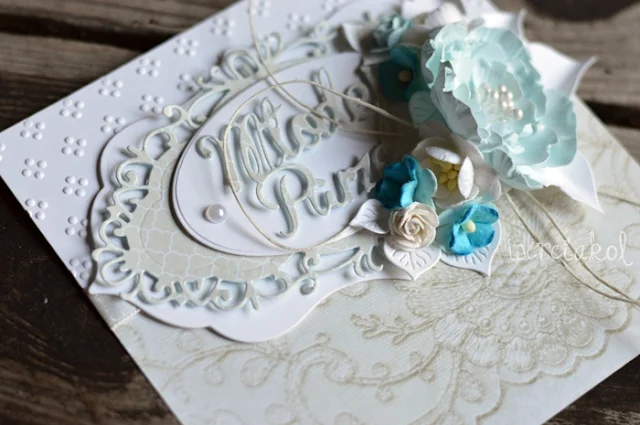
Zapraszam Was dzisiaj na dość prosty kurs na kartkę ślubną.
Jednak umieszczając każdy inny napis - stanie się kartką uniwersalną.
Kurs jest łatwy i przyjemny.
Today I invite you for simply tutorial for a wedding card. But - if you use another caption, you'll get a universally card, for every occasion.
To zaczynamy!
Potrzebujemy:
1. Kwadrat z papieru wizytówkowego- o boku ok. 5 5/8 cala czyli gdzieś 14,3 cm
2. Kwadrat z papieru scrapowego - bok 5 1/4 cala czyli ok. 13,3 cm
3. Prostokąt z papieru wizytówkowego z tłoczonym wzorem (tu pełna dowolność) -
bok 5 1/4 cala (13,3 cm) na 2 cale (ok. 5 cm)
4. Wycinanki z wykrojnika - dwie w prostych kształtach, jedna serwetka (serwetka z papieru scrapowego).
5. Wycinanka (z papieru scrapowego - tego samego co serwetka), bądź tekturka z napisem.
6. Wstążka ok. 20 cm
7. Klej
8. Sznurek
9. Kosteczki 3D
10. Kwiatki ok.8 sztuk
11. Listki wycinanki
12. Perełki
13. Baza kartki kwadratowej 15cm
Lets start!
We need:
1. Square from bristol with a side of about 5 5/8 inches or about 14.3 cm
2. Square from scrapbooking paper - a side of 5 1/4 inches or 13.3 cm
3. The rectangle of bristol with embossed pattern (here full freedom) -
leg 5 1/4 inches (13,3 cm) by 2 inches (about 5 cm)
4. Diecuts of punch - two in simple shapes, one napkin (napkin from scrapbook paper).
5. Diecuts (from scrapbook paper - the same as napkin), or chipboard with inscription.
6. Ribbon about 20 cm
7. Glue
8. Twine
9. Double-side squares 3D
10. Flowers, about 8 pieces
11. Diecuts leaves
12. Beads
13. Square card base 15cm
Na początek przygotowujemy kwadrat z papieru scrapowego i prostokąt z tłoczonego papieru wizytówkowego:
Prepare squares from scrapbook paper and the rectangle from embossed bristol:
Przyklejamy przy górnej krawędzi kwadratu prostokąt z tłoczonego papieru:
We stick at the upper edge of a square rectangle from embossed paper:
We stick at the upper edge of a square rectangle from embossed paper:
Następnie w miejscu łączenia papierów, na środku dajemy kropelkę kleju i przyklejamy wstążkę:
Next in the place, where the papers are connecting we use a drop of glue and add ribbon:
Potem odwracamy kwadrat i doklejamy z tyłu wstążkę. Nadmiar odcinamy:
Then we turn square and stick on the back the ribbon. Excess cut off:
Kolejnym etapem jest już przyklejanie dekoracji. Największą wycinankę podklejamy kosteczkami 3D:
The next step is to glue the decoration. The biggest diecut taped 3D double-side squares:
I przyklejamy na środku w pionie - utrzymując poziom wycinanki na wysokości wstążki:
And glue in the middle of the vertical - maintaining levels diecut at the height of the ribbon:
Następnie znowu na kosteczkach doklejamy wycinankową serwetkę (z papieru scrapowego)
Next - used double-side squares we glue diecut napkin (from scrapbook paper)
Teraz pora na owal z papieru wizytówkowego przyklejony na kosteczkach.
And now is a time to glue oval from bristol:
I na koniec dodajemy wycinankę z napisem- przykleiłam ją na malutkich kosteczkach:
In the end we add diecut with inscription, use small squares 3D:
Umieszczamy ją centralnie na środku owalu:
We locate it in the central space of oval:
Teraz po prawej stronie owalu przyklejamy największy kwiat:
At the right side of oval glue the biggest flower:
Kolejno kokardkę ze sznurka i 3 kwiaty na górze - średni i dwa mniejsze. Ja użyłam tutaj białego kwiatu wiśni, niebieskiego sweethearts i malutkiej róży:
We add bow of twine and 3 flowers on the top - medium and two small. I used here a white cherry blossom, blue sweethearts and small rose:
Potem na dole dodajemy 4 kwiaty, ja mam : biały kwiat jabłoni, dwa sweethearts i jedną różyczkę:
Then at the bottom, add 4 flowers, I have: white apple blossom, the two sweethearts and one rose:
Teraz pora na listki :) Tutaj duże przy dużym kwiatku:
Now is time for a leaves :) Here I added big near the big flower:
A następnie kilka mniejszych, wciskanych pod kwiaty.
Na koniec dodajemy perełkę po lewej stronie napisu:
And some smaller, under the flowers.
At the end add bead on the left side the inscription:
Już prawie na sam koniec bierzemy i lekko postarzamy nożyczkami brzegi dużego kwadratu:
We're almost at the end take the scissors and slightly antiqued edges of a large square:
Teraz tez lekko szarpiemy brzegi naszego ozdobionego kwadratu:
And delicate antiqued edges of our decorated square:
Ozdobiony kwadrat przyklejamy na kosteczkach na białego większego kwadratu:
We glue decorated square into biggest square with 3D double-side squares:
I kleimy klejem do bazy :) I koniec, kartka gotowa. Tak prezentuje się cała:
And glue it to the base :) And it's finish, our card is ready. Here is our result:
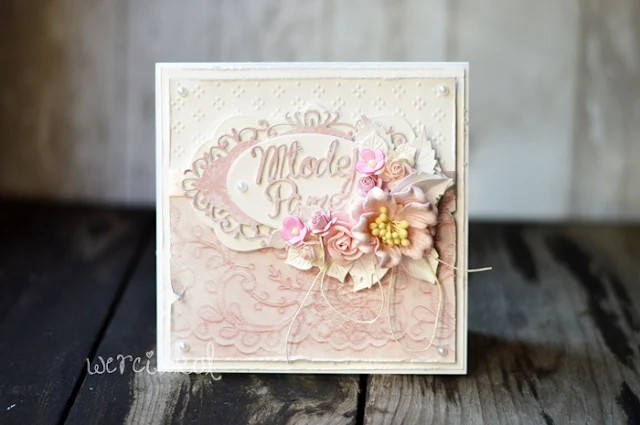
Na podstawie tego kursu zrobiłam jeszcze dwie kartki, z innymi wariantami kolorystycznymi i tłoczeń:
I made also two other cards, used the same tutorial but with another colors and embossing:
Dziękuję, że chcieliście przetrwać tyle zdjęć. Mam nadzieję, że kurs Wam się spodobał i z niego skorzystacie.
Thank you, that you wanted to stay with me and look for so many photos. I hope, that you like this tutorial and that you'll use it.
Pozdrawiam,
Greetings,
Weronika
Materiały/Supplies:


Świetny kursik, skorzystam na pewno, dziękuję :)
OdpowiedzUsuńPiękne!
OdpowiedzUsuńWspaniałe! Jak nadarzy się okazja to na pewno skorzystam z kursiku :)
OdpowiedzUsuńYour cards are beautiful! Thank you so much for the tutorial.
OdpowiedzUsuń